注意:投稿者は素人です。間違えることがあります。
【VScode】ScriptAPIの補完の更新/設定
こちらをご覧ください
【統合版】ScriptAPIでアドオンを作ろう #番外編 自動補完を入れよう
manifest.json (24/12/23現在)
{
  "format_version": 2,
  "header": {
      "description": "説明",
      "name": "名前",
      "uuid": "b04ae331-58de-43d9-9731-c097549304d4",
      "version": [1, 0, 0],
      "min_engine_version": [ 1, 19, 60 ]
  },
  "modules": [
      {
          "description": "",
          "type": "script",
          "language": "javascript",
          "uuid": "726570d0-eb98-4dc4-8420-7fccc2120b47",
          "version": [1, 0, 0],
          "entry": "scripts/main.js"
      }
  ],
    "dependencies": [
        {
            "module_name": "@minecraft/server",
            "version": "1.14.0"
        },
        {
            "module_name": "@minecraft/server-ui",
            "version": "1.3.0"
        }
    ]
}
import文
import { world,system } from "@minecraft/server";
import { ModalFormData,ActionFormData,MessageFormData } from "@minecraft/server-ui"
イベント
イベントは次の二つに分けられる。
◇ ◇ afterEvents
・チャット送信やアイテム使用などをキャンセルができないイベント
・書き込み/読み取りモード
◇ beforeEvents
・チャット送信やアイテム使用をキャンセルできるイベント
・読み取り専用モード
【重要】beforeEventsではワールドに変更を加える次のようなメソッド等が、そのまま実行できない。
・playSound() ・runCommand() ・setBlock() ・setDynamicProperty() など..

実行するには system.run()などを使い、遅延実行する必要がある。
ただし、cancelは遅延後適用できない。
コード例:beforeEvents.chatSendの場合
world.beforeEvents.chatSend.subscribe(ev => {
    ev.sender.runCommand("say message"); // エラーが出る
    ev.cancel = true // キャンセルできる

    // 遅延実行
    system.run(() => {
        ev.sender.runCommand("say message"); // 実行できる
        ev.cancel = true // キャンセルできない
    });
});
使いやすいイベント一覧
afterEvents
https://learn.microsoft.com/en-us/minecraft/creator/scriptapi/minecraft/server/worldafterevents
beforeEvents
https://learn.microsoft.com/en-us/minecraft/creator/scriptapi/minecraft/server/worldbeforeevents
itemUse
アイテムを使用した時に発生するイベント。一番使う。
beforeならアイテム使用をキャンセルできる。
https://learn.microsoft.com/en-us/minecraft/creator/scriptapi/minecraft/server/itemusebeforeevent
chatSend
チャットを実行した時に発生するイベント。ベータAPIでのみ利用可能
beforeならキャンセルができる。
https://learn.microsoft.com/en-us/minecraft/creator/scriptapi/minecraft/server/chatsendbeforeeventitemUseOnアイテムを手に持って、ブロックに触った時に発生するイベント。
beforeなら動作(チェストを開けるなど)をキャンセルできる。
https://learn.microsoft.com/en-us/minecraft/creator/scriptapi/minecraft/server/itemuseonbeforeevent
(最新バージョンでは削除済)
playerInteractWithBlock
ブロックに触った時に発生するイベント。itemUseOnと違い、素手でも反応する。
beforeなら動作(チェストを開けるなど)をキャンセルできる。
https://learn.microsoft.com/en-us/minecraft/creator/scriptapi/minecraft/server/playerinteractwithblockbeforeevent
playerBreakBlock
ブロックを破壊した時に発生するイベント。
beforeなら破壊をキャンセルできる。
https://learn.microsoft.com/en-us/minecraft/creator/scriptapi/minecraft/server/playerbreakblockbeforeevent
playerBlockPlace
ブロックを設置した時に発生するイベント。
beforeなら設置をキャンセルできる。
https://learn.microsoft.com/en-us/minecraft/creator/scriptapi/minecraft/server/playerplaceblockbeforeevent
playerInteractWithEntity
エンティティに触った時(タップ、右クリ)に発生するイベント。
https://learn.microsoft.com/en-us/minecraft/creator/scriptapi/minecraft/server/playerinteractwithentitybeforeevent
entityHurt (after)
ダメージを受けたときに発生するイベント。与えたモブ受けたモブ、ダメージ量などが取れる。
https://learn.microsoft.com/en-us/minecraft/creator/scriptapi/minecraft/server/entityhurtafterevent
entityHitEntity (after)
エンティティに近接攻撃した時に発生するイベント。entityHurtと違い攻撃を当てなくても無条件で発生する。
https://learn.microsoft.com/en-us/minecraft/creator/scriptapi/minecraft/server/entityhitentityafterevent
playerJoin
プレイヤーがワールドに参加した時に発生するイベント。ただプレイヤークラスは取得できず、名前とIDのみ。
発生した瞬間にはプレイヤーがワールドに存在していないので使い勝手が悪い。
https://learn.microsoft.com/en-us/minecraft/creator/scriptapi/minecraft/server/playerjoinafterevent
playerSpawn
プレイヤーがスポーンした時に発生するイベント。ワールド入室時の初期スポーンも検知可能。
プレイヤークラスも取得できるため、プレイヤーの初期化処理であれば、playerJoinよりこちらがオススメ。
https://learn.microsoft.com/en-us/minecraft/creator/scriptapi/minecraft/server/playerspawnafterevent
worldInitialize
ワールドが初期化される時に発生するイベント。/reloadで再読込を行った際にも発動する。
初期化処理などに利用する。
https://learn.microsoft.com/en-us/minecraft/creator/scriptapi/minecraft/server/worldinitializeafterevent
↓ バージョン2.X.Xは以降はこちら
worldLoad
https://learn.microsoft.com/en-us/minecraft/creator/scriptapi/minecraft/server/worldloadafterevent
/scriptevent
scriptAPI版 /function のような機能。/scripteventコマンドで起動できる。
◇jsの構文
system.afterEvents.scriptEventReceive.subscribe(ev => {
    if(ev.id === "saba:hello") {
        ev.sourceEntity.runCommand("say こんにちは");
    }
});
◇コマンドの構文
/scriptevents <id:string> [message(任意):string]
例: /scriptevents saba:hello
JS側で識別子を取得できるので、switchとかで分岐処理する。任意の値(message)も受け取れる。
フォームのテンプレ用 (async/awaitでの記述)
ActionForm
async function showActionForm(player) {
    const actionForm = new ActionFormData()
        .title("タイトル")
        .body("説明")
        .button("ボタン",icon);
    const response = await actionForm.show(player);
    if(response.canceled) return;
    response.selection //選んだボタン番号(0から)
}
ModalForm
async function showModalForm(player) {
    const modalForm = new ModalFormData()
        .title("タイトル")
        .textField("ラベル","プレースホルダ","初期値")
        .dropdown("ラベル",配列,初期値(num))
        .toggle("ラベル",初期値(boolean))
        .slider("ラベル",最小値,最大値,ステップ,初期値(num));
    const response = await modalForm.show(player);
    if(response.canceled) return;
    response.formValues[0] //回答の配列
}
MessageForm
async function showMessageForm(player) {
    const messageForm = new MessageFormData()
        .title("タイトル")
        .body("説明")
        .button1("ボタン1")
        .button2("ボタン2");
    const response = await messageForm.show(player);
    if(response.canceled) return;
    response.selection //button1 → 1 ,button2 → 0
}
扱える変数
・JSの変数で管理する方法
〇メリット
・最強
△デメリット
・ワールドを開き直したり、/relodeをしたりするとデータが初期化される
・メモリが圧迫される可能性がある
以下開き直してもデータが消えないもの
・dynamicPropertiesで管理する方法
〇メリット
・文字列、数値、boolean、Vector3(座標)を変数で扱える。
・ワールド、各エンティティごとに変数が扱える。
・メソッドがあるため操作しやすい。
・実質的にデータ量に制限がない。
△デメリット
・アドオンを抜いてしまうとデータが失われる。
※同じuuidでアドオンを入れ直せば保持される
・tagで管理する方法
〇メリット
・アドオンを抜いてもデータが保持される
・各エンティティごとに変数が扱える
△デメリット
・addTag()が256文字制限になったため、非推奨
・タグとして残るため、プレイヤーから確認できてしまう
・scoreboardのオブジェクトIDまたは仮想スコア名で管理する方法
〇メリット
・文字列で扱え、文字数制限がない・アドオンを抜いてもデータが保持される
△デメリット
・各エンティティごとに使えない。
・アプデ次第で使えなくなりそう。
・データ量が膨大だと処理が遅くなる可能性がある。
・アイテムのLoreで管理する方法
〇メリット
・アドオンを抜いてもデータが保持される
・文字列で扱え、行ごとに文字列を登録できる
△デメリット
・文字数制限(50文字)と行制限(20行)があるため、非推奨
・形として残ってしまう
・個人的使い分け
dynamicPropertyがアプデで便利になったので使う。
複雑なデータの場合は、配列やオブジェクトをJSON.stringify()で文字列に変換して扱う。
オン、オフの切り替え程度ならタグで行う。
dynamicPropertiesの設定
取得、設定、削除
// ワールド
world.getDynamicProperty("変数名");
world.setDynamicProperty("変数名",値);
world.setDynamicProperty("変数名"); // プロパティの削除

// プレイヤー(エンティティ) ※playerはプレイヤークラス
player.getDynamicProperty("変数名");
player.setDynamicProperty("変数名",値);
player.setDynamicProperty("変数名"); // プロパティの削除
String(文字列)を配列とかオブジェクトとして扱うとき
//配列とかオブジェクト → 文字列
JSON.stringify("文字列");

//文字列 → 配列、オブジェクト
JSON.parse(配列、オブジェクト);
sytem.runIntervalとか
一定ティック間隔で動作する
// 1ティック間隔で動作する
system.runInterval(() => {
  // 処理
},1);
・使うときは sytem をインポートするのを忘れない
・最後の1はティック間隔
一定ティック後に動作する
// 20ティック(1秒)に動作する
system.runTimeout(() => {
  // 処理
},20);
スコアの取得
・エンティティスコア
const score = world.scoreboard.getObjective(“オブジェクト”).getScore(player);
・仮想スコア
const score = world.scoreboard.getObjective(“オブジェクト”).getScore(“スコア名”);
インベントリの取得
・インベントリのアイテム
const item = player.getComponent(“inventory”).container.getItem(スロット数);
・手に持ってるアイテム
const item = player.getComponent(“inventory”).container.getItem(player.selectedSlot);
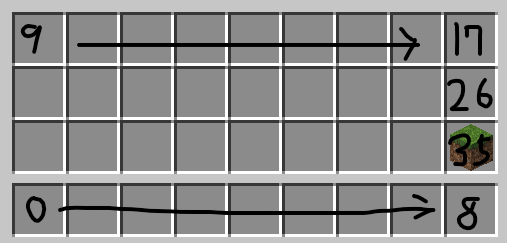
スロットの番号

プレイヤークラスとかの取得方法
①イベントから取る(sourceとかsenderとか)
chatSend → sender
itemUse → source
②ワールドクラスから取る
// ワールド内のすべてのプレイヤークラスを受け取る(配列)
const players = world.getPlayers();
const player = players[0];
getPlayers() は()の中にクエリを入れると条件をつけて取得できる。
クエリは、getPlayers()やgetEntities()で使える。
https://learn.microsoft.com/en-us/minecraft/creator/scriptapi/minecraft/server/entityqueryoptions
// タグ oni と test があるプレイヤー
const players = world.getPlayers({tags:["oni","test"]});
const player = players[0];

// 種族がゾンビのエンティティ
const zombies = world.getDimension("overworld").getEntities({type:"zombie"});
プレイヤー(エンティティ)クラスから取得できるもの、メソッド

プロパティ
// 名前
const name = player.name;

// 頭上の名前(名札で変更できる名前) 変更可能
const nameTag = player.nameTag;

// 種族、例:minecraft:player,minecraft:zombie
const typeId = player.typeId;

// 座標
const location = player.location;
const { x , y , z} = location; //x,y,z座標が入る

// 視点の方向
const rotation = player.getRotation();
const { x , y } = rotation; // x,yが入る

// スニークしているか(true/false)
const isSneaking = player.isSneaking;

// 走っているか
const isSprinting = player.isSprinting;
メソッド
// メッセージを送信する(個人)
player.sendMessage("これはメッセージです");

// コマンドを実行する
// 成功の有無がある
player.runCommand("コマンド");

// タグを持っているか(true/false)
player.hasTag("タグ名");

// 持っているタグ(配列)
player.getTags();

// コンポーネント
inventoryならインベントリ、minecraft:healthを入れたら体力とか色々取得できる
player.getComponent("component");

// OP権限を持っているか(true/false)※relmsでは不具合あり
player.isOp();

// dynamicPropertiesの取得と設定
player.getDynamicProperty("変数名");
player.setDynamicProperty("変数名",値);
ブロック
// ある座標のブロッククラスの取得
const block = world.getDimension("overworld").getBlock({ x: 0, y: 0, z: 0 });

// 座標
const {x,y,z} = block.location;
// ブロックID
const typeId = block.typeId;
// ブロック状態
const blockPerm = block.permutation;
// ブロックStates
const states = blockPerm.getAllStates()
// ブロックの設置(変更)
// 石ブロックを設置
block.setType("minecraft:stone");
// 石ハーフの上付きブロック状態
const blockPerm_stoneSlab = BlockPermutation.resolve("minecraft:stone_block_slab",{"minecraft:vertical_half":"top"});
// ↑を設置
block.setPermutation(blockPerm_stoneSlab);
その他クラスのプロパティやメソッド
/* itemStack Class */
// アイテムid
const typeId = itemStack.typeId;
// アイテム名 変更可能
const nameTag = itemStack.nameTag;
// 量
const amount = itemStack.amount;
その他の便利なメソッド等
// メッセージを送信(全員)
world.sendMessage("全てのプレイヤーに見えるメッセージです");
配列で使えそうなメソッドとか
// プレイヤークラスの配列の取得
const players = world.getPlayers();・forEach() :各要素ごとに実行する。困ったらこれを使う。
// すべてのプレイヤーが挨拶をする
players.forEach(player => {
   player.runCommand("say こんにちは");
});
// for ofでも可
for(const player of players) {
   player.runCommand("say こんにちは");
}
・find() :条件に一致する要素を取り出す。1つだけ取り出すときに使う
// 名前が「Steve」のプレイヤークラスを取り出す
const steve = players.find(player => player.name == "Steve");・filter() :条件に一致する要素から、配列を作り出す。複数の要素を取り出すときに使う
// タグ「win」を持ったプレイヤークラスの配列を作る
const winners = players.filter(player => player.hasTag(“win”));・some() :各要素がひとつでも一致するとtrueを返す。⇔ every() :各要素がすべて一致
// 名前が「Steve」のプレイヤーがいたらメッセージを送る
if(players.some(player => player.name == "Steve")) {
  world.sendMessage("Steveがいるよ!!1);
}


コメント
scripteventのテンプレまってます
1.20.30でこれって使えます?
更新ありがとうございます!
// アイテムid
const typeId = itemStack.typeId;
// アイテム名 変更可能
const nameTag = itemStack.typeId
が同じなような気がしますが、、気のせいでしょうか?
修正しました。報告ありがとうございます。
フォー厶でボタンを押したらコマンドを実行するみたいなのを作りたいのですが、MessageFormを使えばいいんですかね?
ActionForm(複数ボタン)か、MessageForm(2ボタン)を使えばいいと思います。
どこにコマンドを書けばよいのかわかりますか?知識不足ですみません
インデントが表示できないのでコピペして調整してから見てください。
// async/await を使わない例
// 実行するコマンドの配列
const commands = [“say おはよう”,”say こんにちは”,”say こんばんは”];
// フォーム表示&コマンド実行
function commandForm(player) {
// フォームの設定
const form = new ActionFormData()
form.button(“おはよう”);
form.button(“こんにちは”);
form.button(“こんばんは”);
// フォームの表示
form.show(player).then(res => {
// 表示後の処理
// キャンセルなら処理を抜ける
if(res.canceled) return;
// コマンドの実行
// commands[res.selection] → 選んだボタンの値(res.selection)で配列からコマンドを取り出す
player.runCommandAsync(commands[res.selection]);
});
}
選んだ配列ってどこのことですかね。そして上の文字をActionFormのテンプレートの下に追加すればいいということですよね。なかなか理解できず、力不足でごめんなさい。
これはかなりの良記事
質問失礼します。
playerからgetVelocityの値を取得し、移動量に計算する方法を教えていただきたいです。記事の更新から少し時間が経過していますが、返信頂けると嬉しいです。
https://learn.microsoft.com/en-us/minecraft/creator/scriptapi/minecraft/server/entity?view=minecraft-bedrock-stable#getvelocity
const player = world.getPlayers()[0]
const { x, y, z } = player.getVelocity();
const speed = Math.sqrt(x ** 2 + y ** 2 + z ** 2);
返信遅れてすみません。こんなに速く返信してくださりありがとうございます
革装備を染色した状態で装備させたいです!
上の方と同様、染色された装備のItemStackを取得したいんですが、可能でしょうか?
// 視点の方向
const rotation = player.getRotation();
const { x , y } = rotation; // x,yが入る
は今は
const rotation = player.getViewDirection();
const { x, y } = rotation;
ではないでしょうか?
ここでの視点の方向というのは、上下と左右の回転(-180~180)のことを言っています。
const rotation = player.getRotation();
const { x , y } = rotation;
は
const rotation = player.getViewDirection();
const { x, y } = rotation;
ではないでしょうか?
runCommandとsetblockTypeを使ってブロックとか設置したいんだけどエラーばっかりですまたsystem.run()を使用してもエラーです
何が原因でしょうか?
この通りでエラーです
import { world, system, BlockTypes } from “@minecraft/server”;
world.beforeEvents.itemUseOn.subscribe(ev=>{
const { itemStack, block } = ev;
const player = ev.source;
const { x, y, z } = block.location;
if(itemStack) {
if(itemStack.typeId === “minecraft:diamond_axe”){
ev.cancel = true;
world.setDynamicProperty(“blockId”, block.location);
world.sendMessage(`${x} ${y} ${z}`);
system.run(()=>{
player.runCommand(`top ${player.name} ${x} ${y} ${z}`);
});
}
}
});
アップデートでitemUseOnイベントは削除されました。代わりにplayerBlockPlaceイベントを使うことをお勧めします。
解決したけど、itemUseon普通に使えてるけど?
バーションが[1,11,0]だからか?
1.11.0であれば使えます。